Acura NSX Door Panel and Bose Speaker
Removal |
 |
Acura NSX Door Panel and Bose Speaker
Enclosure Removal Instructions
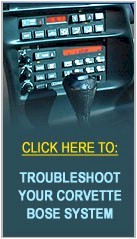
Bose Amplifier Repair -
Lifetime Warranty
See Shipping before sending for repair.
Bose amplifiers are commonly seen in shop for no/low volume, snapping, popping and/or squealing. Our repair rate
includes a LIFETIME warranty. |
 |
1.1) Gently pry rear top panel
from door. |
 |
2.1) Remove panel and check for
all clips. Some will remain on the door. |
 |
3.1) Pry clips from door and
place back onto panel. |
 |
4.1) Gently pry front top panel
from door. |
 |
5.1) Remove panel and check for
all clips. Some will remain on the door. Pry clips from door and place
back onto panel. |
 |
6.1) Gently place pry bar in
crack separating panels.
*NOTE - when using a screw
driver, to prevent trim
panel damage wrap end of screw driver with a shop towel. |
 |
7.1) Lift panel enough to insert
your fingers. |
 |
8.1) Grasp panel and pull back
out of opening. |
 |
9.1) Reinstalling this panel can
be tricky. Hooks must line up into slots when pushing back into place. Bow
the panel at the same time so the back end tabs slip back into place
behind the door handle. |
 |
10.1) Remove screws securing
black plastic on door handle. |
 |
11.1) Pull on door handle to
expose two more screws. These four screws are different from the remaining
screws from this opening. Make a note of them when installing. |
 |
12.1) Remove remaining screws
securing metal plate. |
 |
13.1) Pull assembly slightly from
door. |
 |
14.1) Door open linkage is
secured in a slip lock at the blue piece of plastic.
14.2) The linkage can be pressed out of secure lock with finger pressure. |
 |
15.1) Release trigger on
connector to disconnect from assembly. |
 |
16.1) Twist assembly around to
allow the lock on the end of cable to release through the small opening.
Set panel to side. |
 |
17.1) Start at back of door
panel, gently pull weather stripping away from door panel.
17.2) Remove first exposed screw. |
 |
18.1) Remove second exposed
screw. |
 |
19.1) Working across bottom of
panel, remove first exposed screw. |
 |
20.1) Remove second exposed
screw.
NOTE - Notice small weather stripping clip
was removed when checking for screws. When reinstalling door panel, this
clip and be reinserted into opening, apply pressure to snap in place. |
 |
21.1) Remove third exposed screw. |
 |
22.1) Going up front edge of door
panel, remove first exposed screw. |
 |
23.1) Remove second exposed
screw. |
 |
24.1) To remove door panel, start
at bottom of panel.
24.2) Slightly pull panel from door, pull weather strip from screw eyelet to
allow eyelet to pass over weather stripping. |
 |
25.1) Repeat for second eyelet
along bottom of door panel.
25.2) Repeat for all eyelets. |
 |
26.1) You may need a second set
of hands for these steps.
26.2) Lift rear edge of door panel up out of window jam.
26.3) Lift front edge of door panel up out of window jam.
DO NOT REMOVE PANEL. |
 |
27.1) With help securing door
panel. |
 |
28.1) Reach behind panel, release
trigger on connector at blinking alarm light.
Removing door panel too quickly breaks the wires or
connector. |
 |
29.1) Pull top edge of door panel
down to allow access to lower connectors. |
 |
30.1) Disconnect courtesy light
connector. |
 |
31.1) Disconnect control panel
connector. |
 |
32.1) Disconnect control panel
connector and remove door panel. |
 |
33.1) Bose enclosure with speaker
and amplifier enclosed. The amplifier is the most common problem. We see
this amplifier in shop for repair regularly. |
 |
34.1) Release trigger on
connector and disconnect. |
 |
35.1) There are five screws
securing this Bose enclosure to the door. Remove all screws. |
Bose amplifier repair
Lifetime Warranty
see Shipping before sending for repair. |