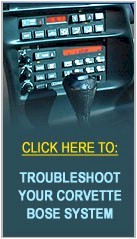
![Removing Malibu Radio, Installing and Replacing](images/ChevroletMalibuStr0530060501xP.jpg) |
Chevrolet Malibu
How to Remove and Replace Car Radio |
![Replace Stereo and Speakers, Remove and Install](images/ChevroletMalibuStr0530060502xP.jpg) |
1.1) Gently pry left side of
panel above glove box from dash releasing clips. All clips release with
pressure. |
![Removing Malibu Radio, Installing and Replacing](images/ChevroletMalibuStr0530060503xP.jpg) |
2.1) Gently pry right side of
panel above glove box from dash releasing clips. |
![Replace Stereo and Speakers, Remove and Install](images/ChevroletMalibuStr0530060504xP.jpg) |
3.1) Remove panel from dash. Set
panel to side.
Note - check panel for clips, some
clips may remain in dash. Later steps will cover removal and installation
of clips. |
![Removing Malibu Radio, Installing and Replacing](images/ChevroletMalibuStr0530060505xP.jpg) |
4.1) Gently pry small panel
below ignition, right of steering column from dash releasing clips. |
![Replace Stereo and Speakers, Remove and Install](images/ChevroletMalibuStr0530060506xP.jpg) |
5.1) Remove panel from dash and
set to side.
Note - check panel for clips, some
clips may remain in dash. Later steps will cover removal and installation
of clips. |
![Removing Malibu Radio, Installing and Replacing](images/ChevroletMalibuStr0530060507xP.jpg) |
6.1) Gently pry left side panel,
left of steering column from dash releasing clips. |
![Replace Stereo and Speakers, Remove and Install](images/ChevroletMalibuStr0530060508xP.jpg) |
7.1) Gently pry right side
panel, left of steering column from dash releasing clips. |
![Removing Malibu Radio, Installing and Replacing](images/ChevroletMalibuStr0530060509xP.jpg) |
8.1) Remove panel from dash.
8.2) This panel does not need to be disconnected, allow to hang in place.
Note - check panel for clips, some clips may remain in
dash. Later steps will cover removal and installation of clips. |
![Replace Stereo and Speakers, Remove and Install](images/ChevroletMalibuStr0530060510xP.jpg) |
9.1) Lower dash panel, left and
below steering column, remove one bolt. |
![Removing Malibu Radio, Installing and Replacing](images/ChevroletMalibuStr0530060511xP.jpg) |
10.1) Lower dash panel, right and
below steering column, remove one bolt. |
![Replace Stereo and Speakers, Remove and Install](images/ChevroletMalibuStr0530060512xP.jpg) |
11.1) Below steering column,
grasp upper middle edge of panel. |
![Removing Malibu Radio, Installing and Replacing](images/ChevroletMalibuStr0530060513xP.jpg) |
12.1) Pull right side of panel
from dash releasing clips. |
![Replace Stereo and Speakers, Remove and Install](images/ChevroletMalibuStr0530060514xP.jpg) |
13.1) Pull left side of panel
from dash releasing clips. |
![Removing Malibu Radio, Installing and Replacing](images/ChevroletMalibuStr0530060515xP.jpg) |
14.1) From passenger side, remove
one bolt bottom left of glove box. |
![Replace Stereo and Speakers, Remove and Install](images/ChevroletMalibuStr0530060516xP.jpg) |
15.1) From passenger side, remove
one bolt bottom right of glove box. |
![Removing Malibu Radio, Installing and Replacing](images/ChevroletMalibuStr0530060517xP.jpg) |
16.1) Open glove box and remove
one exposed bolt on left side. |
![Replace Stereo and Speakers, Remove and Install](images/ChevroletMalibuStr0530060518xP.jpg) |
17.1) Remove one exposed bolt at
center of glove box. |
![Removing Malibu Radio, Installing and Replacing](images/ChevroletMalibuStr0530060519xP.jpg) |
18.1) Open glove box and remove
one exposed bolt on right side. |
![Replace Stereo and Speakers, Remove and Install](images/ChevroletMalibuStr0530060520xP.jpg) |
19.1) Push edge of glove box
pocket toward center of glove box allowing glove box stop to pass side
stop. |
![Removing Malibu Radio, Installing and Replacing](images/ChevroletMalibuStr0530060521xP.jpg) |
20.1) When glove box stop is
released, entire glove box pocket will drop from opening. |
![Replace Stereo and Speakers, Remove and Install](images/ChevroletMalibuStr0530060522xP.jpg) |
21.1) Remove one exposed bolt
left side of glove box assembly frame. |
![Removing Malibu Radio, Installing and Replacing](images/ChevroletMalibuStr0530060523xP.jpg) |
22.1) Car stereo dash trim plate
could not be remove from dash because of side lip on panel hidden behind
glove box frame assembly. |
![Replace Stereo and Speakers, Remove and Install](images/ChevroletMalibuStr0530060524xP.jpg) |
23.1) Car stereo dash trim plate
could not be remove from dash because of side lip on panel hidden behind
lower steering wheel panel. |
![Removing Malibu Radio, Installing and Replacing](images/ChevroletMalibuStr0530060525xP.jpg) |
24.1) Grasp left side of panel at
lip, pull from dash releasing clip, clips along upper edges of car stereo
dash panel will release. |
![Replace Stereo and Speakers, Remove and Install](images/ChevroletMalibuStr0530060526xP.jpg) |
25.1) Grasp right side of panel
at lip, pull from dash releasing clip, clips along upper edges of car
stereo dash panel will release. |
![Removing Malibu Radio, Installing and Replacing](images/ChevroletMalibuStr0530060527xP.jpg) |
26.1) Pull car stereo dash panel
slightly from dash. |
![Replace Stereo and Speakers, Remove and Install](images/ChevroletMalibuStr0530060528xP.jpg) |
27.1) Set Parking Brake and shift
to lower gear. |
![Removing Malibu Radio, Installing and Replacing](images/ChevroletMalibuStr0530060529xP.jpg) |
28.1) Swing bottom of car stereo
dash trim panel up. |
![Replace Stereo and Speakers, Remove and Install](images/ChevroletMalibuStr0530060530xP.jpg) |
29.1) Swinging panel up will
allow access to connector at top of panel. Release trigger on connector to
disconnect. |
![Removing Malibu Radio, Installing and Replacing](images/ChevroletMalibuStr0530060531xP.jpg) |
30.1) Remove car stereo dash trim
panel and set to side. |
![Replace Stereo and Speakers, Remove and Install](images/ChevroletMalibuStr0530060532xP.jpg) |
Clip Removal
31.1) Check all panels for missing clips.
31.2) With needle nose pliers, squeeze edges of clips stuck in dash to
release and remove. |
![Removing Malibu Radio, Installing and Replacing](images/ChevroletMalibuStr0530060533xP.jpg) |
32.1) Check panels for missing
clips and press into place ready for reinstallation. |
![Replace Stereo and Speakers, Remove and Install](images/ChevroletMalibuStr0530060534xP.jpg) |
33.1) Remove one bolt left side
of AC control panel. |
![Removing Malibu Radio, Installing and Replacing](images/ChevroletMalibuStr0530060535xP.jpg) |
34.1) Remove one bolt right side
of AC control panel. |
![Replace Stereo and Speakers, Remove and Install](images/ChevroletMalibuStr0530060536xP.jpg) |
35.1) Pull AC control panel from
dash, allow panel to lay on lower center console. |
![Removing Malibu Radio, Installing and Replacing](images/ChevroletMalibuStr0530060537xP.jpg) |
36.1) Remove two bolts left side
of car stereo. |
![Replace Stereo and Speakers, Remove and Install](images/ChevroletMalibuStr0530060538xP.jpg) |
37.1) Remove two bolt right side
of car stereo. |
![Removing Malibu Radio, Installing and Replacing](images/ChevroletMalibuStr0530060539xP.jpg) |
38.1) Pull car stereo from dash. |
![Replace Stereo and Speakers, Remove and Install](images/ChevroletMalibuStr0530060540xP.jpg) |
39.1) Remove antenna connector
and release triggers on connectors to disconnect. |